 Save
Save I'll never forget the year my sister challenged me to make our holiday cheese board look like something from a fancy magazine spread. We were hosting twenty people, and I was stressed about the presentation until she handed me a wedge of Gouda and said, "Just make it look like a forest." That's when the Tannenbaum Border was born—a simple, elegant trick that transformed our ordinary board into something that guests still ask about every December. It's become our family's signature move, and now I can't imagine a holiday spread without those little cheese trees standing sentinel around the edges.
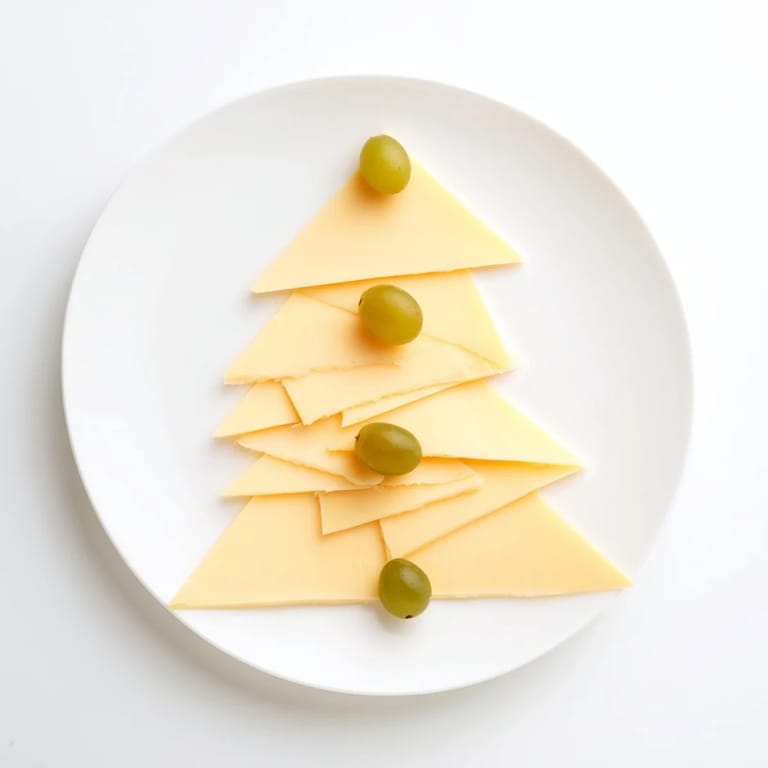
I remember standing in my kitchen at 5 p.m. on Christmas Eve, realizing I'd forgotten to add any visual drama to our spread. My hands were already sticky with cranberry sauce, and I had fifteen minutes before guests arrived. That's when I grabbed a sharp knife, started slicing cheese into thin triangles, and arranged them like little evergreen trees. My daughter watched from the counter and said, "Mom, that's actually really pretty," and suddenly my stress melted away. Now that moment—the calm that comes from creating something beautiful under pressure—is what this border represents to me.
Ingredients
- Semi-firm cheese (Gouda, Edam, or Emmental), 250 g, well chilled: These cheeses have the perfect texture for slicing into clean, thin triangles without crumbling or tearing. Keeping them cold is the secret—warm cheese becomes impossible to slice neatly. Gouda gives you a slightly sweet, buttery flavor, while Edam is a bit more delicate. I learned the hard way that room-temperature cheese will ruin the entire effect, so take it out of the fridge only when you're ready to slice.
- Small green seedless grapes, 150 g, washed and thoroughly dried: These tiny orbs nestle perfectly between the cheese triangles and provide pops of color and refreshing sweetness. Drying them completely prevents excess moisture from sliding around on your board. The seedless varieties are essential here—seeds will distract from the clean visual line you're creating. I always buy these a day ahead so they have time to dry properly in the crisper drawer.
Tired of Takeout? 🥡
Get 10 meals you can make faster than delivery arrives. Seriously.
One email. No spam. Unsubscribe anytime.
Instructions
- Slice your cheese into pine tree shapes:
- Take your chilled cheese and, using a sharp chef's knife, slice it into thin triangles roughly 5 to 6 centimeters long and about 1 centimeter wide at the base. The key is keeping even pressure as you slice—let the knife do the work rather than sawing. You're aiming for that thin, elegant triangle that reads immediately as a stylized tree when someone looks at the board. I usually get about 20 to 24 triangles from a 250-gram block, but don't stress about perfection. Any small mistakes will disappear once the grapes are in place.
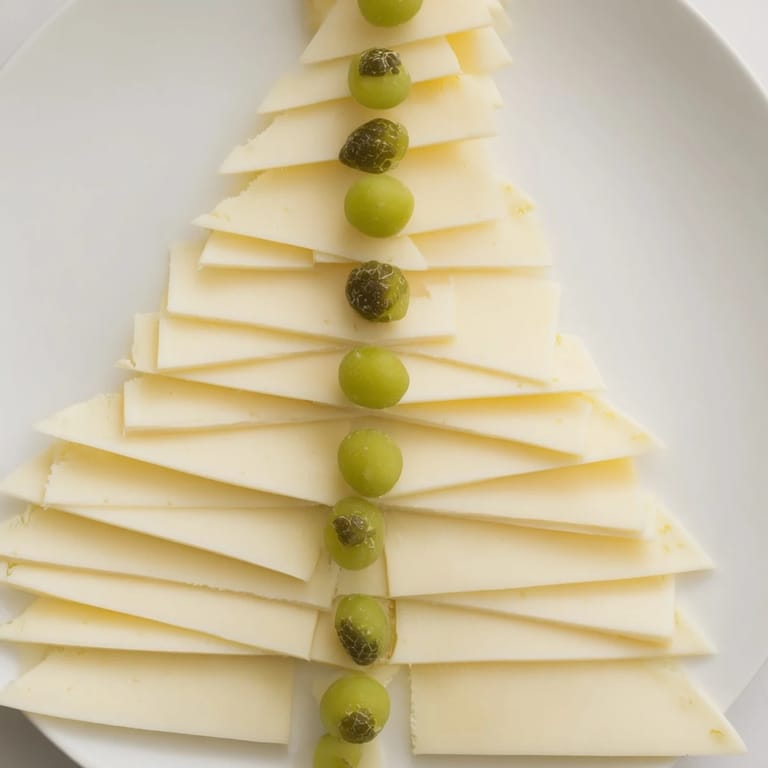
- Arrange the cheese triangles along the board's edges:
- Starting at one corner of your serving platter, begin placing the cheese triangles point-side outward, like little trees marching around the perimeter. Think of them as forming a protective forest around your board's edge. Space them about 1 to 2 centimeters apart—close enough that they feel cohesive, but with enough room for the grapes to nestle between them. Work your way around all four edges, adjusting and shifting as needed until the whole border feels balanced and intentional.
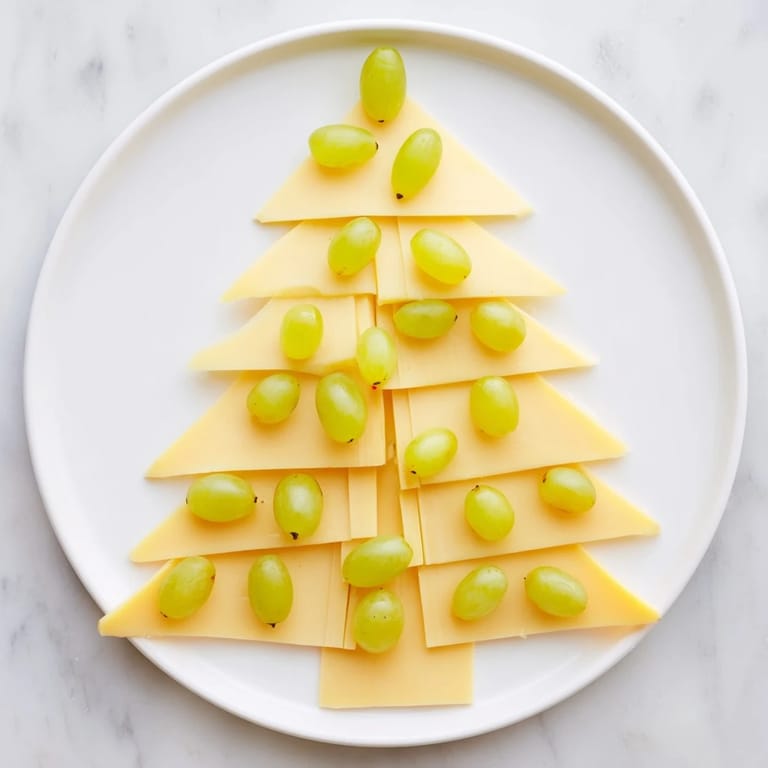
- Fill the gaps with grapes:
- Now comes the fun part. Take your dried grapes and tuck them into every gap between the cheese triangles, around the points, and along the edges. The grapes do double duty—they add festive color and they anchor the cheese in place so nothing shifts when guests reach for pieces. This is where the board truly comes alive, where it transforms from "some cheese triangles" into "oh, that's a forest!" I like to step back every few grapes and admire the effect, adjusting colors and spacing as I go.
- Continue until the entire border glows:
- Keep working around the board until every edge is lined with alternating cheese and grapes, creating a complete frame of festive green and golden tones. This usually takes about 10 minutes total, and you'll find a rhythm—slice, place, grape, adjust, repeat. The repetitive nature of it is actually meditative, a nice counterpoint to the chaos of holiday cooking.
- Fill the center with your choice of accompaniments:
- Once your forest border is complete and looks exactly as festive as you imagined, fill the center of the board with whatever cheeses, cured meats, crackers, and spreads you'd like. The border you've created now frames everything beautifully, giving the entire board a polished, intentional look that speaks to the care you've taken.
 Save
Save The moment I knew this border idea had truly landed was when my normally picky uncle—the one who always says, "Just give me plain cheese and crackers"—stopped mid-conversation to photograph the board. He spent five minutes trying to get the lighting right, showing it to everyone around him like he'd discovered something magical. In that moment, I realized it wasn't just about making something pretty for Instagram. It was about creating an edible piece of art that made people pause, smile, and feel like they were part of something special.
The Magic of Presentation
There's something almost meditative about arranging food into patterns and shapes. When you take five minutes to make a cheese board look intentional instead of thrown together, suddenly guests feel honored. They feel like you've made an effort specifically for them, even though it took just a quarter hour. This border teaches us that presentation doesn't require fancy techniques or exotic ingredients—it requires only attention and intention. Once I started thinking about food arrangement this way, every platter I made felt like a small gift to whoever was eating it.
Cheese Choices and Flavor Combinations
While Gouda, Edam, and Emmental are the classic choices for this border because they slice beautifully, there's room for experimentation. Aged cheddar works wonderfully if you like something with more bite, though it can be slightly crumbly if not ice-cold. Gruyère adds a sophisticated nuttiness that pairs beautifully with those fresh grapes. The key is choosing cheeses firm enough to slice cleanly into triangles. I've learned through trial and error that the very best boards actually layer different cheese varieties throughout the center—maybe a creamy brie next to a sharp aged cheddar, with a truffle cheese adding intrigue. The border becomes a frame that elevates whatever you place inside it.
Making It Festive Beyond the Holidays
While the Tannenbaum Border is undeniably festive at Christmas, I've found it works year-round with tiny adjustments. In spring, replace the green grapes with white ones and add fresh mint leaves between the cheese triangles. Summer calls for a mix of green and red grapes with fresh basil tucked throughout. Fall is when pomegranate arils and a few cranberries join the grapes for deeper colors. The structure remains the same, but the personality shifts with the seasons. This has become my go-to formula whenever I need a board that looks more intentional than ordinary.
- Always let your grapes air-dry completely before placing them—moisture is your enemy for clean presentation
- Chill your cutting board and knife before slicing cheese for the smoothest cuts possible
- If building the board more than two hours ahead, cover it loosely with plastic wrap to prevent the cheese from drying out
 Save
Save This simple border has taught me that the most elegant entertaining doesn't require hours in the kitchen. Sometimes the best moments come from quick ideas and careful execution. Every time I build one of these festive frames, I'm reminded that we eat with our eyes first, and taking those few minutes to make food look like a small miracle is never wasted time.
Cooking Guide
- → What type of cheese works best for the border?
Semi-firm cheeses like Gouda, Edam, or Emmental work well as they slice thinly and hold their shape for the pine tree effect.
- → How should the cheese slices be cut?
Cut the cheese into thin, triangular shapes roughly 5–6 cm long and about 1 cm wide at the base to resemble stylized pine trees.
- → Can I substitute the grapes with other fruits?
Green seedless grapes provide color and texture contrast, but you can include red grapes or pomegranate seeds for extra festive flair.
- → What is the best way to arrange the border on the board?
Place the triangle slices along all four edges with points facing outward, then nestle grapes between and around them to fill gaps.
- → How long does it take to prepare this border?
The entire arrangement takes about 15 minutes to prepare, making it an easy and quick addition to holiday servings.