 Save
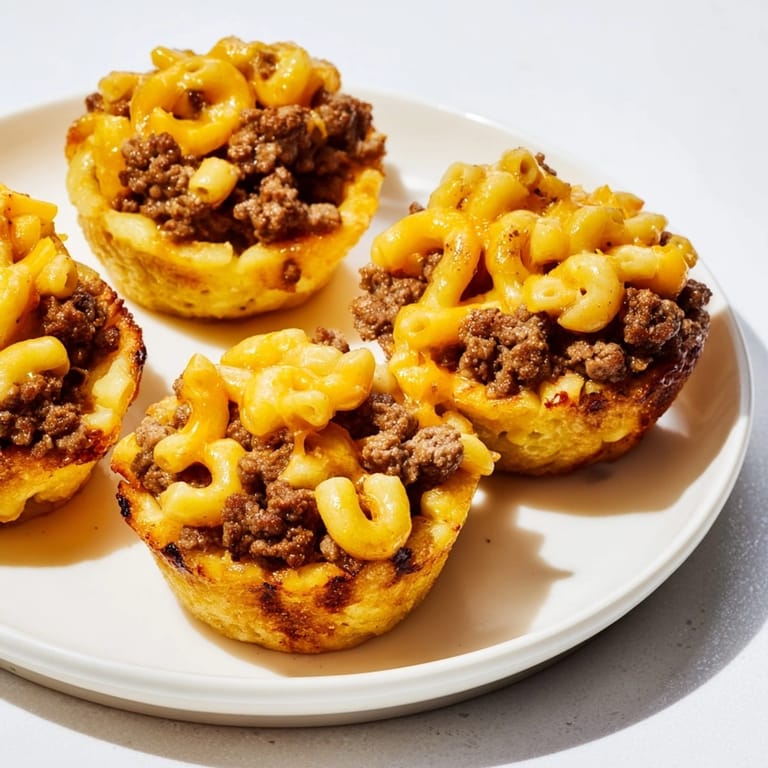
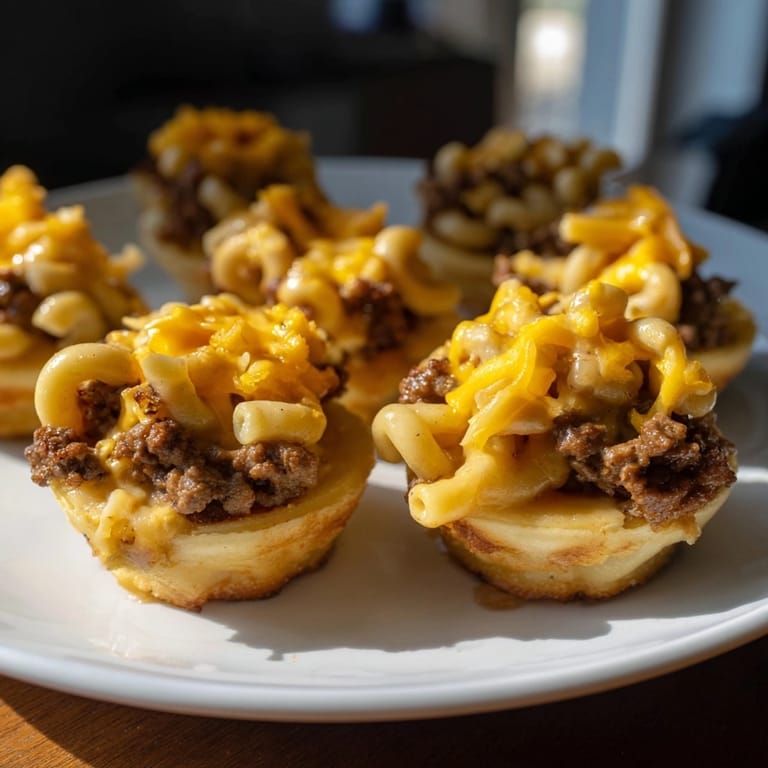
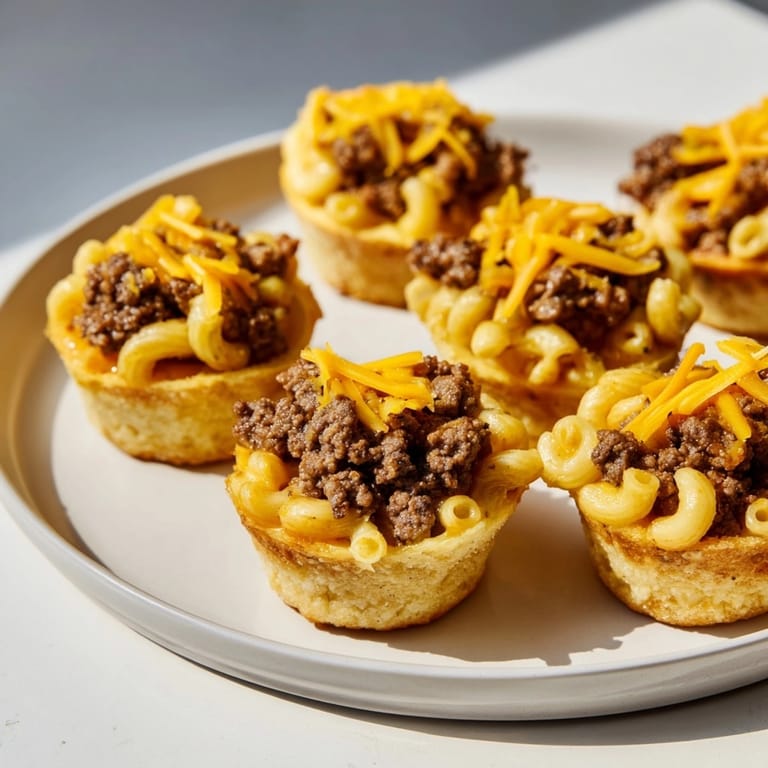
Save This playful recipe fuses everything you love about classic cheeseburgers and creamy mac and cheese, then bakes them up into handheld muffin cups. These Mac and Cheese Cheeseburger Cups are incredibly comforting and make a fun, crowd-pleasing appetizer or easy weeknight meal for both kids and adults.
My family absolutely devours these every time I make them. The first time I baked a batch for a game day potluck, there were zero leftovers and multiple recipe requests.
Ingredients
- Elbow macaroni: provides the creamy pasta base and classic mac and cheese texture. Always choose macaroni with a smooth surface for best sauce absorption
- Whole milk: helps create a rich cheese sauce. Look for milk with a good fat content for creaminess
- Shredded cheddar cheese: delivers bold, classic mac and cheese flavor. For best melt, grate from a block instead of using pre-shredded
- Grated Parmesan cheese: boosts umami and gives the sauce savory depth. Choose real Parmesan for more flavor
- Unsalted butter: gives you control over the salt level in the sauce and improves richness
- All-purpose flour: thickens the cheese sauce
- Dijon mustard: gently sharpens the cheese flavor and is worth seeking out
- Salt and freshly ground black pepper: balance all the flavors
- Ground beef: brings classic cheeseburger taste. Use beef with moderate fat for juiciness but drain if there is excess fat
- Finely chopped onion: melds into the beef mixture to add savory sweetness. Yellow onions work best
- Ketchup: infuses a hint of tangy sweetness that reminds you of a cheeseburger
- Yellow mustard: adds zesty flavor. Make sure it is classic American style
- Worcestershire sauce: introduces subtle savoriness and depth
- Garlic powder: brings mellow warmth and enhances the beef
- Mini burger buns or flattened sandwich bread: make the crusty cup. Opt for buns that are soft but sturdy enough to hold the filling
- Shredded cheddar cheese for topping: melts to golden perfection
- Nonstick cooking spray: prevents sticking so the cups release cleanly from the tin
Tired of Takeout? 🥡
Get 10 meals you can make faster than delivery arrives. Seriously.
One email. No spam. Unsubscribe anytime.
Instructions
- Prepare the Oven and Muffin Tin:
- Set your oven to 375°F or 190°C. Coat a 12-cup muffin tin lightly with nonstick cooking spray. This prevents sticking and helps the cups slide out easily.
- Cook the Macaroni:
- Bring a medium pot of salted water to a full boil. Add the macaroni and stir occasionally for even cooking. Boil until the pasta is just al dente no more than the minimum time stated on your package. Drain promptly and set aside so the pasta does not overcook.
- Make the Cheese Sauce:
- In a medium saucepan over medium heat, melt the butter until just foamy but not browned. Add the flour and whisk vigorously for one minute to cook out the raw flour taste. Start adding milk gradually while whisking continuously. Cook for about two to three minutes until the sauce thickens to the consistency of heavy cream.
- Finish the Mac and Cheese:
- Take the pan off the heat. Stir in the shredded cheddar, Parmesan, Dijon mustard, a pinch of salt, and a generous grind of black pepper. Whisk until you have a silky sauce. Fold in the drained macaroni so the pasta is evenly coated and creamy. Set aside.
- Prepare the Cheeseburger Mixture:
- Heat a skillet over medium-high. Add ground beef and onions, breaking the beef into small crumbles with a spatula. Sauté until the beef is fully browned and the onions are translucent, about five or six minutes. If there is excess fat, drain it well.
- Season the Beef:
- Add the ketchup, yellow mustard, Worcestershire sauce, garlic powder, another pinch of salt, and a few grinds of pepper. Stir thoroughly and let this cook for just one additional minute so the flavors meld.
- Shape the Bread Cups:
- Take each mini bun or flattened bread slice and press it gently but firmly into each muffin cup, shaping it around the sides and base. Try to avoid any cracks so the fillings stay inside as they bake.
- Assemble the Cups:
- Spoon about one tablespoon of the cheeseburger mixture into the bottom of each bread cup. Use the back of a spoon to press it down gently and create a flat layer.
- Top with Mac and Cheese:
- Heap a generous spoonful of mac and cheese onto each cup, taking care to fill the cups all the way to the top but without overflowing.
- Add Final Cheese Layer:
- Sprinkle the remaining shredded cheddar over the mac and cheese on each cup. Make sure every cup gets some so the tops bake golden and crisp.
- Bake:
- Place the muffin tin in the center of your hot oven. Bake for fifteen to eighteen minutes or until the tops are golden brown and you see the edges bubbling slightly.
- Cool and Serve:
- Let the muffin tin cool for five minutes before carefully lifting out each cup with a thin spatula. Serve warm while the cheese is still melty and delicious.
 Save
Save My favorite part is how the mac and cheese transforms in the oven. The edges get crisp while the centers are molten and cheesy. Last Thanksgiving, my cousin begged to take extras home for midnight snacking.
Storage Tips
Let the cups cool completely before storing. Transfer them into an airtight container and refrigerate for up to three days. For longer storage, freeze the cooled cups in a single layer and then transfer to a zip-top bag. When reheating, cover loosely with foil and warm in a toaster oven or regular oven at 325°F until heated throughout. Microwaving is fine for a quick lunch but you lose some crispness.
Ingredient Substitutions
Ground turkey or chicken both work well for a lighter filling. For a vegetarian variation, use a plant-based beef substitute and amp up the flavor with smoked paprika and a touch more Worcestershire. Any good melting cheese can be swapped for cheddar: try Monterey jack or Gouda for a little twist. Whole wheat slider buns or gluten free sandwich bread will adapt the recipe to your needs with minor textural changes.
Serving Suggestions
These cups are delicious on their own but you can dress them up. Offer little bowls of ketchup, mustard, or burger sauce for dipping. Serve with a crisp salad or a tray of crunchy pickles for a playful dinner. These also make a hit at backyard BBQs or casual potlucks.
Cultural and Historical Context
The roots of these cups lie in two all-American comfort classics. Mac and cheese has been a favorite since colonial times, while hamburgers became iconic in the early twentieth century. This recipe unites both traditions in a single bite, perfect for today's on-the-go eating.
Seasonal Adaptations
To make these feel cozy for fall or winter use a sharp cheddar and tuck a thin slice of tomato under the beef. In summer try a sprinkle of fresh chives on top. Around the holidays swap in leftover roasted turkey and cranberry mustard for a festive brunch treat.
Recipe Notes
For an extra kick stir chopped jalapeños into the beef. You can assemble the day before and bake right before serving. Mini muffin tins work for bite-size party snacks.
Success Stories
After bringing these to a school potluck my daughter's teacher asked for the recipe and said they disappeared even faster than the cupcakes. Another time I made a double batch and froze half for easy after-school snacks and they were just as tasty when reheated.
Freezer Meal Conversion
Line a baking sheet with parchment and freeze uncooked, assembled cups until firm. Transfer to a bag and stash in the freezer. Bake directly from frozen at 350°F adding about five extra minutes until hot and crisp.
 Save
Save Serve these Mac and Cheese Cheeseburger Cups hot and watch them vanish from the table. Each bite blends comfort and fun for a crowd-pleasing treat.
Cooking Guide
- → Can I make these ahead of time?
Yes, you can assemble the cups in advance and bake them just before serving for the best texture and taste.
- → What can I use instead of beef?
Ground turkey or plant-based substitutes work well and offer lighter or vegetarian options for the filling.
- → How do I prevent the bread from getting soggy?
Flatten the bread well and bake until golden; a thin layer of cheese helps seal and crisp the bread base.
- → Can I freeze leftovers?
Yes, cool the baked cups completely, wrap tightly, and freeze. Reheat in the oven to restore crispiness.
- → Are there gluten-free or dairy-free alternatives?
Use gluten-free bread and pasta, and swap cheeses with dairy-free options to suit dietary needs.
- → What dips pair well with these cups?
Ketchup, mustard, burger sauce, or spicy aioli complement the flavors and make great dipping choices.